Today I tested the Screencast Keys with the last version of Blender 3D - version 2.78.
One great addon can be used to share your work over 3D Blender community.
This addon will show the keys and mouse actions into Blender 3D.
The Blender 3D addon can be downloaded from here and then just put into your Blender 3D path: blender-2.78-rc2-windows64\2.78\scripts\addons.
Now next step is to enable it from: User Preferences > Add-Ons > 3D View.
Restart your Blender 3D software to make setting.
The setting can be allow with start under right panel by using key N and will find the Screencast Keys area.
You can also just start working by press the keys: Shift+Alt+C.
The addon is very useful for most blender users.
duminică, 2 octombrie 2016
vineri, 23 septembrie 2016
Dynamic Draw - vector graphics editor.
This software is a vector graphics editor and can be found it here.
Working with instalation and portable version under Windows OS.
It is an object-oriented drawing and design program and is for making flowcharts, line drawings, org charts, buttons, etc.
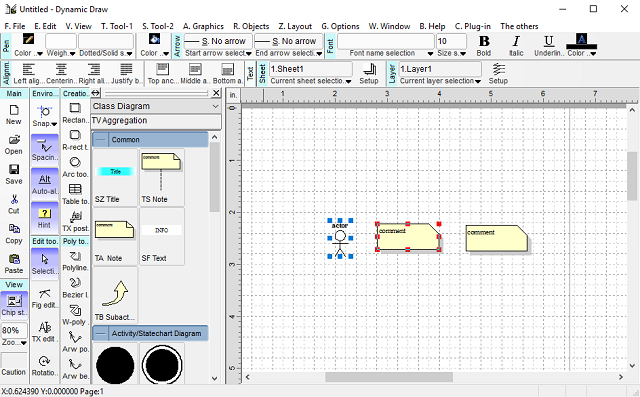
It has intelligent linking system by using the keys T and V ( or will select your arrow line with another key from tool menu).
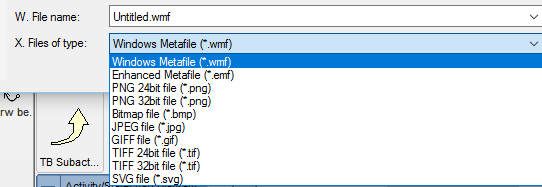
It can export the graphics image as SVG, JPG, TIFF, PNG, EMF, WMF, PSD, BMP.
It supports OLE and that help you to copy objects and paste on other applications as OLE.The official website come with just one prepared a demonstration movie (see here).
Working with instalation and portable version under Windows OS.
It is an object-oriented drawing and design program and is for making flowcharts, line drawings, org charts, buttons, etc.
It has intelligent linking system by using the keys T and V ( or will select your arrow line with another key from tool menu).
It can export the graphics image as SVG, JPG, TIFF, PNG, EMF, WMF, PSD, BMP.
It supports OLE and that help you to copy objects and paste on other applications as OLE.The official website come with just one prepared a demonstration movie (see here).
marți, 20 septembrie 2016
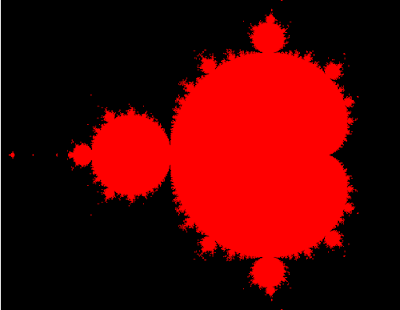
Mandelbrot with three.js .
The Mandelbrot set is the set of complex numbers c for which the function f c ( z ) = z 2 + c . - wikipedia.org
You need to download the three.js - java script from threejs webpage.
The source code is simple. Come with default HTML5 page and javascripts.
One part of this will make vertex-shader and fragment shader, both is 2D shader type.
You need the canvas tag with id="canv".
The last part of source code is make to put all into one image processing by shaders.
You can read this tutorial here.
 <!DOCTYPE html>
 <html>
 <head>
 <meta charset="UTF-8">
 <title>Title of the document</title>
 <script src="three.js"></script>
 </head>
 <body>

 <canvas id="canv" width="640" height="480"></canvas>

 <script id="2d-vertex-shader" type="x-shader/x-vertex">
 attribute vec2 a_position;
  void main() {
   gl_Position = vec4(a_position, 0, 1);
  }
 </script>

 <script id="2d-fragment-shader" type="x-shader/x-fragment">
  #ifdef GL_FRAGMENT_PRECISION_HIGH
   precision highp float;
  #else
   precision mediump float;
  #endif
  #define PI 3.14159

 float hash( float n ) { return fract(sin(n)*753.5453123); }

 #define NUM_STEPS  50
  #define ZOOM_FACTOR 2.0
  #define X_OFFSET  0.5

  #ifdef GL_FRAGMENT_PRECISION_HIGH
   precision highp float;
  #else
   precision mediump float;
  #endif
  precision mediump int;

  void main() {
   vec2 z;
   float x,y;
   int steps;
   float normalizedX = (gl_FragCoord.x - 320.0) / 640.0 * ZOOM_FACTOR *
             (640.0 / 480.0) - X_OFFSET;
   float normalizedY = (gl_FragCoord.y - 240.0) / 480.0 * ZOOM_FACTOR;

   z.x = normalizedX;
   z.y = normalizedY;

   for (int i=0;i<NUM_STEPS;i++) {

   steps = i;

     x = (z.x * z.x - z.y * z.y) + normalizedX;
     y = (z.y * z.x + z.x * z.y) + normalizedY;

     if((x * x + y * y) > 4.0) {
      break;
     }

     z.x = x;
     z.y = y;

   }

   if (steps == NUM_STEPS-1) {
    gl_FragColor = vec4(1.0, 0.0, 0.0, 1.0);
   } else {
    gl_FragColor = vec4(0.0, 0.0, 0.0, 1.0);
   }
  }
 </script>
 <script type="text/javascript">
 var gl;
 var canvas;
 var buffer;
  window.onload = init;

  function init() {


   canvas    = document.getElementById('canv');
   gl      = canvas.getContext('experimental-webgl');
   canvas.width = 640;
   canvas.height = 480;

   gl.viewport(0, 0, gl.drawingBufferWidth, gl.drawingBufferHeight);

 var shaderScript;
 var shaderSource;
 var vertexShader;
 var fragmentShader;

  buffer = gl.createBuffer();
  gl.bindBuffer(gl.ARRAY_BUFFER, buffer);
  gl.bufferData(
   gl.ARRAY_BUFFER,
   new Float32Array([
    -1.0, -1.0,
     1.0, -1.0,
    -1.0, 1.0,
    -1.0, 1.0,
     1.0, -1.0,
     1.0, 1.0]),
   gl.STATIC_DRAW
  );

   render();

  }

 function render() {

   window.requestAnimationFrame(render, canvas);

   gl.clearColor(1.0, 0.0, 0.0, 1.0);
   gl.clear(gl.COLOR_BUFFER_BIT);

  shaderScript = document.getElementById("2d-vertex-shader");
  shaderSource = shaderScript.text;
  vertexShader = gl.createShader(gl.VERTEX_SHADER);
  gl.shaderSource(vertexShader, shaderSource);
  gl.compileShader(vertexShader);

  shaderScript  = document.getElementById("2d-fragment-shader");
  shaderSource  = shaderScript.text;
  fragmentShader = gl.createShader(gl.FRAGMENT_SHADER);
  gl.shaderSource(fragmentShader, shaderSource);
  gl.compileShader(fragmentShader);

  program = gl.createProgram();
  gl.attachShader(program, vertexShader);
  gl.attachShader(program, fragmentShader);
  gl.linkProgram(program);
  gl.useProgram(program);
  positionLocation = gl.getAttribLocation(program, "a_position");
  gl.enableVertexAttribArray(positionLocation);
  gl.vertexAttribPointer(positionLocation, 2, gl.FLOAT, false, 0, 0);

  gl.drawArrays(gl.TRIANGLES, 0, 6);
  }
 </script>
 </body>
 </html>
duminică, 18 septembrie 2016
News about Blender second release candidate and other projects.
The Chairman Blender Foundation and producer Blender Institute, Mr.
Ton Roosendaal comw with this news about second release candidate and
other projects:
Hi everyone,

Here are notes from today's 14 UTC meeting in irc.freenode.net
#blendercoders.

1) Blender 2.78 RC2

- Second release candidate is out!
http://download.blender.org/release/Blender2.78/

- Release logs are also taking shape:
https://wiki.blender.org/index.php/Dev:Ref/Release_Notes/2.78
https://www.blender.org/features/2-78/

Based on tracker reporting and further testing we either do a RC3 or
the actual release this week. Sergey Sharybin and Bastien Montagne are
 monitoring it closely.

2) Other projects and 2.8

- Currently Blender for OSX links to an Apple system library for
quicktime (qtkit).
This has been deprecated for long, and will be removed from
XCode 10.12.
We have to decide if we want to drop this, and make Blender for
OS X use ffmpg for
all codecs.

- Julian Eisel uploaded custom manipulators patch for review
https://developer.blender.org/D2232
Code docs
https://wiki.blender.org/index.php?title=User:Julianeisel/Custom_Manipulators

- Mike Erwin is in Amsterdam, with Dalai Felinto and others
he will do design sessions
on the 2.8 viewport. Expect interesting logs and docs!

Thanks,

-Ton-
Abonați-vă la:
Postări (Atom)