Pages

Se afișează postările cu eticheta Shader Editor. Afișați toate postările

duminică, 17 martie 2024

Shader Editor - example 005.

... another shader for Shader Editor:
#ifdef GL_FRAGMENT_PRECISION_HIGH
precision highp float;
#else
precision mediump float;
#endif

uniform vec2 resolution;
uniform float time;
uniform vec4 mouse;
uniform vec4 date;

//#define time  iTime
#define R resolution.xy
void mainImage( out vec4 fragC, in vec2 fC)
{
   vec2 pos = (fC.xy/R.xy) * 8. - 4.;
    pos.x *= R.x / R.y;
    float s = .26, f = 10.0, k = f;
    vec3 p = vec3(pos, sin(time ) * .15)* s;

    for( int i=0; i< 5; i++ )
    {
           p = (abs(p)/dot(p,p) - 1.33);
           k = length(p);
        
           p = 0.95*s/(p*k-p)*k;
   }
   f = (dot(dot(p,p),0.9*s)/(s/dot(p,p)));
   fragC= vec4(f, f *1.2, f * 9.1, 1.0);;
}

void main() {
vec4 fragment_color;
mainImage(fragment_color, gl_FragCoord.xy);
gl_FragColor = fragment_color;
}

vineri, 15 martie 2024

Shader Editor - example 004.

This is not 100% my shader, I found an example on the web and adapted it for March. It is quite optimized and can be further optimized. I did it rather quickly because I can't really afford to use up my time and resources without having a financial or health-related gain. You can turn it into wallpaper with the ShaderToy Android application.
#ifdef GL_FRAGMENT_PRECISION_HIGH
precision highp float;
#else
precision mediump float;
#endif

#define _ParticlesAmount 10
uniform vec2 resolution;
uniform float time;
float rnd(float x)
{
    return fract(sin(dot(vec2(x + 47.49,38.2467 / (x + 2.3)), vec2(12.9898, 78.233))) * (43758.5453));
}

float draw_leaf(vec2 uv, float scale, float d) {
    float ret;
    vec2 root = uv - vec2(1.0, scale);
    float r = length(root) / scale;
    float t = abs(atan(root.x, root.y) / 3.1415);
    float edge = (3.0 * t - 8.0 * t*t*t*t + 6.0 * t*t*t*t*t) / (4.0 - 3.0 * t);
    ret = smoothstep(edge - d, edge + d, r);
    return ret;
}

mat2 rotate(float t) {
    return mat2(cos(t), -sin(t), sin(t), cos(t));
}

float drawClover(vec2 uv, float scale, float d) {
    float ret = draw_leaf(uv, scale, d);
    uv = rotate(2.0) * uv;
    ret *= draw_leaf(uv, scale, d);
    return 1.0 - ret;
}

vec4 alphaBlend(vec4 base, vec4 blend)
{
    return vec4(base.rgb * base.a * (1.0 - blend.a) + blend.rgb * blend.a, blend.a + base.a * (1.0 - blend.a));
}
// conversion from a web shadertoy
//void mainImage( out vec4 fragColor, in vec2 fragCoord )

void main() {
{
    vec2 uv = (2.0 * gl_FragCoord.xy - resolution.xy) / min(resolution.x, resolution.y);
    float t = smoothstep(1.5, 0.0, length(uv));
    gl_FragColor = vec4(t * vec3(1, 0.8784, 0.9333) + (1.0 - t) * vec3(0.9568, 0.7451, 0.8118), 1.0);
    float j;
    float move_max = 1.0;
    vec2 spawn_center = vec2(0.0, 0.0);
    float spawn_length = 0.5;
    float _ParticlesAmount_f = float(_ParticlesAmount);
    for (int i = 1; i < _ParticlesAmount; i++)
    {
        j = float(i);
        float rnd1 = rnd(cos(j));
        float delayedTime = (0.2 + 0.2 * rnd1) * time;
        float d = floor(delayedTime / move_max);
        float rnd2 = rnd(j * d);
        float rnd3 = rnd(j * j * d);
        float r = delayedTime / move_max - d;
        float x_wave = 0.15 * sin(delayedTime * 7.0 + 6.282 / j);
        vec2 spawn = vec2(0.0, rnd3 * spawn_length);
        float ease = pow(2.0, 5.0 * (r - 1.0));
        float y_move = move_max * ease;
        float opacity = 1.0 - ease - pow(2.0, -30.0 * r);
        float scale = 1.0 - 0.65 * rnd1 + 0.15 * sin(1.8 * time * j / _ParticlesAmount_f + 6.282 / j);
        float rot_wave = 2.0 * sin(delayedTime * 3.0 * j / _ParticlesAmount_f * 2.0 + 6.282 / j);
        vec2 center = rotate(rot_wave) * (rotate(6.282 * rnd2) * (uv + spawn_center) + spawn + vec2(x_wave, y_move)) * scale;
        vec3 cloverColor = vec3(0.3 + 0.3 * rnd2, 0.98, 0.3) * (1.0 - 0.3 * rnd3);
        vec3 cloverCenterColor = cloverColor + (vec3(1.0) - cloverColor) * 0.5;
        vec3 cloverBgColor = vec3(1.0, 0.98, 0.7);
        gl_FragColor = alphaBlend(gl_FragColor, vec4(cloverBgColor, opacity * drawClover(center, 0.1, 0.3)));
        gl_FragColor = alphaBlend(gl_FragColor, vec4(cloverColor, opacity * drawClover(center, 0.1, 0.01)));
        gl_FragColor = alphaBlend(gl_FragColor, vec4(cloverCenterColor, opacity * drawClover(center, 0.05, 0.3)));
    }
 }
} 

joi, 15 februarie 2024

Shader Editor - example 005.

Today I posted on my instagram three shaders created to be used as phone wallpapers using the Shader Editor Android software option.
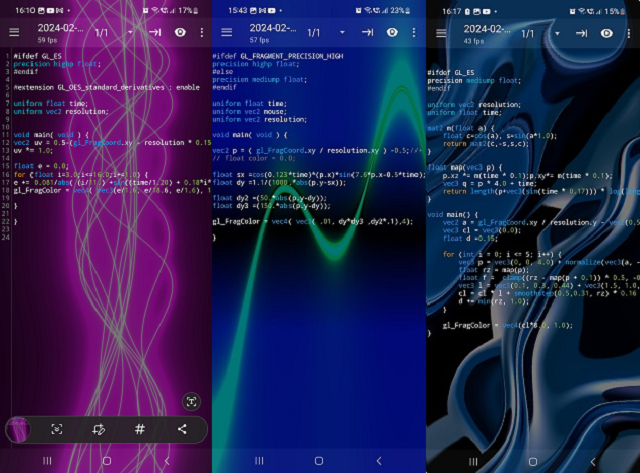
Somewhere in my posts I specified that this android application allows you to create shaders and then you can add them as dynamic wallpaper on phone.
The three source codes are open-source and you can test and use them with the android application and they will run very well as wallpapers:
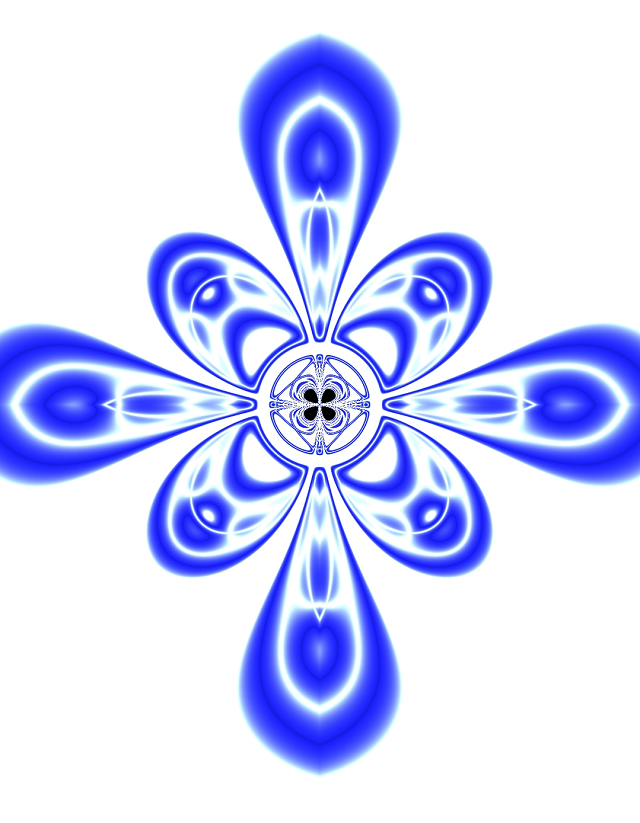
This is a shader that I like as a design because it is relaxing and I put a more feminine color because spring is coming.
#ifdef GL_ES
precision highp float;
#endif

#extension GL_OES_standard_derivatives : enable

uniform float time;
uniform vec2 resolution;


void main( void ) {
vec2 uv = 0.5-(gl_FragCoord.xy - resolution * 0.15) / max(resolution.x, resolution.y) * 5.0;
uv *= 1.0;

float e = 0.0;
for (float i=3.0;i<=16.0;i+=1.0) {
e += 0.081/abs( (i/11.) +sin((time/1.20) + 0.18*i*(uv.y) *( cos(i/2.10 + (time / 11.0) - uv.y*.4) ) ) + 2.5*uv.x);
gl_FragColor = vec4( vec3(e/1.6, e/18.6, e/1.6), 1.0);

}

}
This is a dynamic sin cos combination
#ifdef GL_FRAGMENT_PRECISION_HIGH
precision highp float;
#else
precision mediump float;
#endif

uniform float time;
uniform vec2 mouse;
uniform vec2 resolution;

void main( void ) {

vec2 p = ( gl_FragCoord.xy / resolution.xy ) -0.5;//+ mouse / 4.0;
// float color = 0.0;

float sx =cos(0.123*time)*(p.x)*sin(7.6*p.x-0.5*time);
float dy =1.1/(1000.*abs(p.y-sx));

float dy2 =(50.*abs(p.y-dy));
float dy3 =(150.*abs(p.y-dy));

gl_FragColor = vec4( vec3( .01, dy*dy3 ,dy2*.1),4);
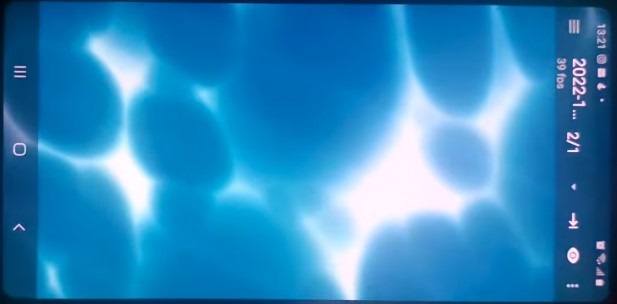
}
This shader has a darker style:
#ifdef GL_ES
precision mediump float;
#endif

uniform vec2 resolution;
uniform float time;

mat2 m(float a) {
    float c=cos(a), s=sin(a*1.0);
    return mat2(c,-s,s,c);
}

float map(vec3 p) {
    p.xz *= m(time * 0.1);p.xy*= m(time * 0.1);
    vec3 q = p * 4.0 + time;
    return length(p+vec3(sin(time * 0.17))) * log(length(p) + 0.10) + sin(q.x + sin(q.z + sin(q.y))) * 1.8;
}

void main() {
    vec2 a = gl_FragCoord.xy / resolution.y - vec2(0.5, 0.5);
    vec3 cl = vec3(0.0);
    float d =0.15;

    for (int i = 0; i <= 5; i++) {
        vec3 p = vec3(0, 0, 4.0) + normalize(vec3(a, -1.0)) * d;
        float rz = map(p);
        float f = clamp((rz - map(p + 0.1)) * 0.5, -0.1, 1.0);
        vec3 l = vec3(0.1, 0.3, 0.44) + vec3(1.5, 1.0, 1.0) * f;
        cl = cl * l + smoothstep(0.5,0.31, rz) * 0.16 * l;
        d += min(rz, 1.0);
    }

    gl_FragColor = vec4(cl*8.0, 1.0);
}

marți, 6 februarie 2024

News : Shader Editor source code.

If you follow my blogger, you've seen some shaders I made for my background phone.
These shaders are created with this Android app called Shader Editor.
You can find the source code of this application on this GitHub project.

miercuri, 9 august 2023

Shader Editor - example 004.

Another example with the Shader Editor android application, this time simpler:
This shader displays some concentric circles that change their colors according to a sine and cosine formula.
This is the source code for the shader:
#ifdef GL_FRAGMENT_PRECISION_HIGH
precision highp float;
#else
precision mediump float;
#endif

uniform vec2 resolution;
uniform float time;

void main(void) {
 float mx = max(resolution.x, resolution.y);
 vec2 uv = gl_FragCoord.xy / mx;
 vec2 center = resolution / mx * 0.5;
 float t = time * 10.0;

 gl_FragColor = vec4(cos(t+distance(uv, center) / 222.0)+1.0,
  vec2(sin(t - distance(uv, center) * 76.0)) * 10.5,
  1.0);
}

marți, 8 noiembrie 2022

Shader Editor - example 003.

Today I will show you how to change a shader from shadertoy website to a shader for Shader Editor android aplication.
Open my shader example from shader toy website.
#define f length(fract(q*=m*=.6+.1*d++)-.5)

void mainImage( out vec4 fragColor, in vec2 fragCoord )
{
    float d = 0.;
    //vec3 uv = vec3(fragCoord.xy / iResolution.xy,iTime*.2);
    vec3 q = vec3(fragCoord.xy/iResolution.yy-13., iTime*.2);
    mat3 m = mat3(-2,-1,2, 3,-2,1, -1,1,3);
    vec3 col = vec3(pow(min(min(f,f),f), 7.)*40.);
    fragColor = vec4(clamp(col + vec3(0., 0.35, 0.5), 0.0, 1.0), 1.0);
}
In order to use it in the Shader Editor android application you need to make these changes:
#ifdef GL_FRAGMENT_PRECISION_HIGH
precision highp float;
#else
precision mediump float;
#endif

uniform vec2 resolution;
uniform float time;
uniform vec4 mouse;
uniform vec4 date;

#define f length(fract(q*=m*=.6+.01*d++)-.5)

void mainImage( out vec4 fragColor, in vec2 fragCoord )
{
  float d = 0.91;
  vec3 q = vec3(fragCoord.xy/resolution.yy-13., time*.2);
  mat3 m = mat3(-2,-3,6, 3,-1,1, 0,3,1);
  vec3 col = vec3(pow(min(min(f,f),f), 7.)*40.);
  fragColor = vec4(clamp(col + vec3(0., 0.35, 0.5), 0.0, 1.0), 1.0);
}

void main() {
vec4 fragment_color;
mainImage(fragment_color, gl_FragCoord.xy);
gl_FragColor = fragment_color;
}
You can see these changes are n the first part of the source code and just one on time.
You can play with this source code then use the option Set as wallpaper to have it on your phone.

marți, 1 noiembrie 2022

Shader Editor - example 002.

This post is just one simple example, you can find many tutorials if you search on web for my work ...
If you don't have enough time to test my last shader source code then you can test now with another source code to have a beautiful blue effect.
Let's see the source code for this shader:
#ifdef GL_FRAGMENT_PRECISION_HIGH
precision highp float;
#else
precision mediump float;
#endif

uniform vec2 resolution;
uniform float time;
uniform vec4 mouse;
uniform vec4 date;

//#define time  iTime
#define R resolution.xy
void mainImage( out vec4 fragC, in vec2 fC)
{

//   vec2 pos = (fragCoord.xy/R.xy) * 8. - 4.;
   vec2 pos = (fC.xy/R.xy) * 8. - 4.;
    pos.x *= R.x / R.y;
    float s = .25, f = .0, k = f;
    vec3 p = vec3(pos, sin(time * .4) * .5 - .5)* s;

    for( int i=0; i< 9; i++ )
    {
           p = abs(p)/dot(p,p)- 1.5;
           k = length(p) ;
           p = p*k+k;
   }

   f = dot(p,p)* s;
   fragC= vec4(f*.5, f *1.2, f * 5., 0.111);;
}

void main() {
vec4 fragment_color;
mainImage(fragment_color, gl_FragCoord.xy);
gl_FragColor = fragment_color;
}

sâmbătă, 29 octombrie 2022

Shader Editor - example 001.

You can test your skills in shader theory with this excellent android application named Shader Editor.
The application can be found on google play.
After installation, you can use the eye icon to toggle between the source code and the output and the three dots icon to load, load samples, and save ...
If you want to rename it after creating a new shader or save it as a new shader, just click on the icon with three lines and double-click on the shader's name.
This is a shader created for my cardboard virtual reality and set for my eye anatomy ...
#ifdef GL_FRAGMENT_PRECISION_HIGH
precision highp float;
#else
precision mediump float;
#endif

uniform vec2 resolution;
uniform vec2 cameraAddent;
uniform mat2 cameraOrientation;
uniform samplerExternalOES cameraBack;

void main(void) {
vec2 uv = gl_FragCoord.xy / resolution.xy;
vec2 st = cameraAddent + uv* cameraOrientation * vec2(tan(0.805),cos(0.31));
gl_FragColor= vec4(
texture2D(cameraBack, st*vec2(2.0,1.0)).rgb,0.1);
}