Pages

Se afișează postările cu eticheta programming. Afișați toate postările

joi, 21 noiembrie 2019

Shadertoy: The flag of Romania - 002.

This is another step about learning shaders.
The old example can be updated with this source code.
I commented on the source code to see step by step how this working.
One way to understand how this working to the final result is to going back on the shader structures that generate output to the basic elements of the shader.
If we apply this case to solve the problem then from the display a color like a vec4 color for fragColor adding a sin function to wave the result, and so on.
Right, this code can be optimized in many ways depending on the result.
// learning process area step by step 
// the gl_FragColor is a vec4 type of float values in the range 0 to 1.
// because the values are from 0 to 1  this can used in many ways with for domain and range
void mainImage( out vec4 fragColor, in vec2 fragCoord )
{
    // Normalized pixel coordinates (from 0 to 1)
    vec2 uv = fragCoord/iResolution.xy;
    // define a vec2 and uv can be divide to create waves 
    // use this to see the difference 
    // vec2 valul = vec2(0.01,1.0);
    vec2 valul = vec2(0.5,1.0);
    // define a vec2 this vector will be the vector of shadow
    vec2 unghi_valul = vec2(0.5,1.0);
    // this float will speed the animation with iTime
    float viteza = 3.0;
    // with the dot we can calculate the dot product of two vectors and result can be a shadow
    // the result of unghi can be changed when change the vectors and vectors math rules
    float unghi = dot(uv/valul, unghi_valul) - iTime * viteza;
    // the output can be used with sin to create a shadow wave
    // fill the screen with red
    fragColor = vec4(1,0,0,0) * sin(unghi);
    // fill the 2/3 of size with yellow color
    if(uv.x<(1.0/1.5))
    fragColor = vec4(1,1,0,0)  * sin(unghi);
    // fill the last 1/3 with the blue color 
    if(uv.x<1.0/3.0)
    fragColor = vec4(0,0,1,0)  * sin(unghi);
}
The result of this source code:

miercuri, 20 noiembrie 2019

Shadertoy: The flag of Romania - 001.

Today I make the flag of Romania.
About this flag you can read at Wikipedia.
The goal of this simple tutorial is to learn the link between iResolution and the fill areas.
First, you need to normalized pixel coordinates from 0 to 1.
The gl_FragColor is a vec4 type of float values in the range 0 to 1.
We can use this property by fill the areas of the screen.
The example can be changed to use the RGBA.
The source code is this:
void mainImage( out vec4 fragColor, in vec2 fragCoord )
{
    // Normalized pixel coordinates (from 0 to 1)
    vec2 uv = fragCoord/iResolution.xy;
    // Output to screen
    // fill the screen with red
    fragColor = vec4(1,0,0,0);
    // fill the 2/3 of size with yellow color
    if(uv.x<(1.0/1.5))
    fragColor = vec4(1,1,0,0);
    // fill the last 1/3 with the blue color 
    if(uv.x<1 .0="" code="" fragcolor="vec4(0,0,1,0);">
This is the result of this shader:

miercuri, 6 noiembrie 2019

Shadertoy: Simple sky with shadertoy tool.

Today I create a simple sky with the online tool shadertoy.
I used Fedora 30 distro Linux and my old video card:
VGA compatible controller: NVIDIA Corporation GT218 [GeForce 210] (rev a2)
This is the output:

miercuri, 18 septembrie 2019

CodePen: Include shadertoy example in the webpage.

This issue can be solve it easy.
You need to get the iframe share from you shadertoy example.
Then use my example HTML and CSS from my codepen example.
You can remove the javascript code from example.
This javascript code is used to show the formula of sphere. I used my shadertoy example named Ray Marching - 001.

duminică, 25 august 2019

Blockly for young programmers.

Blockly is an open source library that makes it easy to add block based visual programming to an app, see the official webpage.
This tool has a good graphics and one great design to understand the flow of programming issue.
This project is good for kids and teenagers to start programming and see the source code into programming languages.
For example, the program build with this tool can be convert into programming language like: Java Script, Python, PHP, Lua and Dart.
You can see a simple video tutorial from the official Google Developers Youtube channel:

luni, 10 iunie 2019

News: Construct 3 updated 5 hours ago.

Construct 3 is the best software to create games. Over 60,000 users monthly make & sell thousands of games globally.
This game engine is not free.
Included features:
  • runs in your browser;
  • works offline;
  • auto updates;
Try it now on the official webpage.

marți, 28 mai 2019

Using blotter.js with channels.

This javascript library comes with this intro:
A JavaScript API for drawing unconventional text effects on the web. Blotter.js requires Three.js and Underscore.js. If you're already including these files in your project, view the information on custom builds to get the file size significantly smaller.
See more here.
The HTML5 is simple with an empty div tag.
The CSS is just for design an is not affected by the script.
I used this:
https://cdnjs.cloudflare.com/ajax/libs/Blotter/0.1.0/blotter.min.js
https://cdnjs.cloudflare.com/ajax/libs/Blotter/0.1.0/materials/channelSplitMaterial.min.js
If you want a distortion effect you need to use this:
https://cdnjs.cloudflare.com/ajax/libs/Blotter/0.1.0/materials/channelSplitMaterial.min.js
The javascript takes the div tag and used it:
//
let text = new Blotter.Text("28:08:2019", {
  family : "sans-serif",
  size : 128,
  fill : "#000"
});

let material = new Blotter.ChannelSplitMaterial();
material.uniforms.uOffset.value = 0.05;
material.uniforms.uAnimateNoise.value = 1;


let blotter = new Blotter(material, {
  texts : text
});

let el = document.getElementById("blotter-channels");
let scope = blotter.forText(text);

scope.appendTo(el);
The result is this:
See the Pen blotter-channels by Cătălin George Feștilă (@catafest) on CodePen.

marți, 21 mai 2019

Show SVG with the anime javascript library.

First of all the anime javascript library can be found at the official webpage.
Start with the empty project on codepen.io website.
You need to add the javascript library into the editor by using the wheel icon of JS area:
https://cdnjs.cloudflare.com/ajax/libs/animejs/2.2.0/anime.min.js
You can add the SVG source code with the path and then this will be parsed by javascript script.
The CSS code is used to stylize the output.
For example, the size of the path can be used like this:
.anim path {
  stroke-width: 3;
}
Then use the source code from my example.
See the result of this source code:
See the Pen animejs_001 by Cătălin George Feștilă (@catafest) on CodePen.

sâmbătă, 18 mai 2019

Blender 3D and Google Summer of Code - 2019 Projects.

The Blender Development team start this issue with 8 projects by students and mentors:

The projects have been announced and we are now in the Community Bonding Period. For a month, students learn about the Blender project, the communication channels and development environment. 
This is also the time to make sure that the proposal is clear and has the support of the community. 
Coding starts on 27 May.

You can find all info at Google Summer of Code - 2019 Projects
More about the projects area and teams can be seen at devtalk blender development.

luni, 8 aprilie 2019

The RenderDoc tool graphics debugger.

RenderDoc is a free MIT licensed stand-alone graphics debugger that allows quick and easy single-frame capture and detailed introspection of any application using Vulkan, D3D11, OpenGL & OpenGL ES or D3D12 across Windows 7 - 10, Linux, Android, Stadia, or Nintendo Switch™. RenderDoc can be used as an image viewer.
If you drag in or use file to open then you can open images in a variety of formats like: .dds, .hdr, .exr, .bmp, .jpg, .png, .tga, .gif, .psd.
The tool come with python A.P.I. for testing.
The full features can be found here.
You can see the geometry data visualized in 3D and with each component separated out and formatted.
This tool can be found at the official webpage.

joi, 21 martie 2019

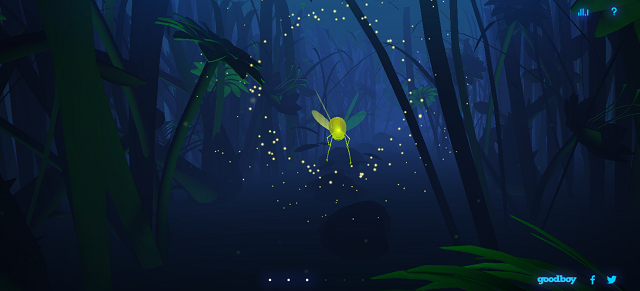
Lumina by goodboydigital.

Today I come with a web page with great graphics and a design to measure.
The web page is interactive and urges you to drive a firefly through the forest to collect light.
See the full project on the webpage.

miercuri, 16 ianuarie 2019

Shadertoy: Shader objects with raymarching technique.

Another article about shader raymarching technique for today.
It's like the previous article created from the official video channel named The Art of Code.
The source code show how to create the basics objects like: capsule, torus, cube and cylinder.
The result of the source code of raymarching objects can be found on my account of ShaderToy website named catafest.

marți, 15 ianuarie 2019

Shadertoy: About raymarching technique with source code.

The raymarching technique is a fairly new technique used to render realtime scenes and it is entirely computed in a screen-space shader.
The raymarching is similar to traditional raytracing (in that a ray is cast into the scene for each pixel) but is not the same technique.
How this works:
We have in a fragment shader is the position of the point we are rendering in world 3D coordinates and the view direction from the camera.
For each ray is extended by step in the view direction, until it hits something and creates a point.
This is the simple raymarching used a constant step.
The next step is the optimization calls for the use of signed distance fields.
A distance field is a function that takes in a point as input and returns the shortest distance from that point to the surface any object in the scene similar with a sphere around the hit point.
Distance fields allow us to limit how often we need to sample when marching along the ray, this is the reason of the named raymarching.
You can follow this technique on the official video channel named The Art of Code.
The result of the source code of raymarching example from this video tutorial can be found on my account of ShaderToy website.

luni, 7 ianuarie 2019

Shadertoy: Flame 2D by catafest.

I create another shader using the shadertoy online tool.
This online tool helps users to understand the shaders theory.
All of the shaders theory is based on the math of graphics.
My example uses the basic shader for a 2D flame with minimal parameters to understand easier the math of this shader.
Let's see the source code:
// define iTime like Shader Inputs
#define time iTime
void mainImage( out vec4 fragColor, in vec2 fragCoord )
{
    // Normalized pixel coordinates (from 0 to 1)
    // vec2 uv = fragCoord/iResolution.xy;
 // create center of position of flame by xy and sized
 vec2 pos = ( fragCoord.xy / iResolution.xy )*2.0-vec2(1.,1.);
    // create flame variation 
    if(pos.y>-3.0){
  // variation by time and set up to -3.0
        // the 0.1 and 30 parameters create the variation of flame 
        // with ths sin and fract functions
        pos.y += 0.1*fract(sin(30.0*time));
 }
    // select background to black
 vec3 color = vec3(0.0,0.0,0.0);
 // set scale of flame 
 float p =.001;
    // create shape of flame (output y)
 float y = pow(abs(pos.x),3.0)/(1.0*p)*1.0;
 // create the hight of flame 
 float flame_out = length(pos+vec2(pos.x,y))*sin(0.9);
 // fix colors flame by RGB 
 if(flame_out < 0.9){
        // color for RG (red green)
  color.rg += smoothstep(0.0,0.3,0.6-flame_out);
        // fix color of flame by G (green)
  color.g /=2.4;
 }
 color += pow(color.r,1.0);
 // output color
    fragColor = vec4(color,1.0);

}
The result can be found here.

duminică, 9 decembrie 2018

Brackets - another editor for development.

This is a modern, open source text editor with a great design that understands web design and is named Brackets.
Is created with JavaScript and you can contribute and create your extensions.
The team development comes with this intro:
Brackets is a lightweight, yet powerful, modern text editor. We blend visual tools into the editor so you get the right amount of help when you want it without getting in the way of your creative process. You'll enjoy writing code in Brackets.
This editor can be found at the official webpage.
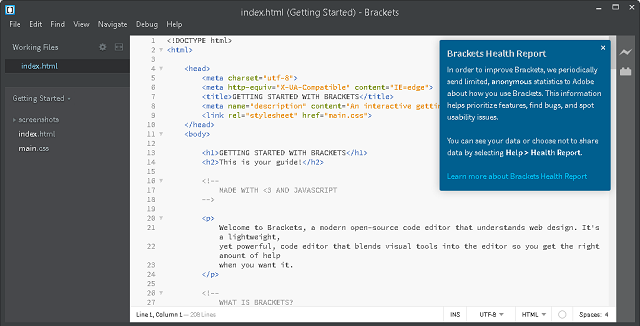
See this screenshot with this editor:

joi, 8 noiembrie 2018

Unity 3D : Unity 2D Challenge.

Here's an unexpected opportunity for Unity 3D game developers to develop 2D games.
About this challenge the Unity team come with this info:
The prizes:
1st - $2000
2nd - $1000
3rd - $500
Special Mention - $500
Join the Unity 2D Challenge to become part of an exciting community journey exploring the possibilities of our new 2D tools.
How to participate 
Create a small piece of content using Unity’s 2D tools. It can be anything from pixel-perfect retro-style art to a snippet of hand-drawn platforming gameplay or a thin vertical slice of a 2D competitive brawler. Anything goes, as long as it’s 2D. See the FAQ at the bottom for more info.
See this video intro:

luni, 29 octombrie 2018

OpenProcessing website.

You can create an account on this website to test your skills with processing programming language.
About OpenProcessing then this programming language uses some awesome Licensed and Open Source components.
You can see my working sketches here.

miercuri, 3 octombrie 2018

Thunkable : Create online mobile applications for iOS and Android.

Thunkable is the platform where anyone can build their own mobile applications for iOS and Android.
This online tool is free to use with a google account.
The Thunkable platform charges a maintenance fee for the use of certain components such as Ads by AdMob and Payment by Stripe.
You can start build your on an app is as simple as dragging and dropping your favorite components and connecting them together with blocks.
Learn how to make your first app from this video from official youtube channel:

miercuri, 13 iunie 2018

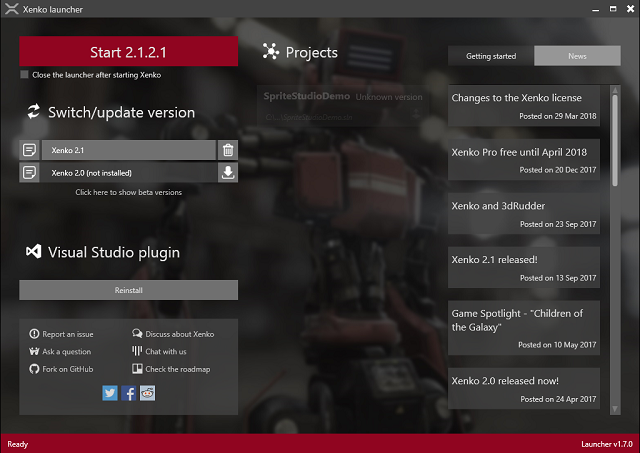
The Xenko game engine .

The Xenko Beta version is available for free .
This is old news from Xenko game engine team:

Long time no see!

The Xenko promotion period has ended, and we’ve made some changes to the license plans.

As of 1 April 2018, Xenko Pro and Xenko Pro Plus are no longer available.

Xenko Personal is still free for personal use and for businesses of less than $200,000 US in annual revenue. If you don’t meet the Xenko Personal criteria, contact us for a custom plan.

If your business makes over $200,000 US in annual revenue, and you downloaded Xenko before 1 April 2018, you can continue to use Xenko until 1 April 2019. If you want to use Xenko after that, you need to contact us to create a custom plan before 1 April 2019.

vineri, 13 aprilie 2018

Using p5.js to create a progressbar .

This is an old tutorial about how to create a progressbar with processing.
To convert to p5.js you need to change the processing source code to javascript.
You can read about this conversion here.
In my example I change all variable types to var and I remove the frame.setTitle.
If you using the processing I.D.E. then you need to change from the right area from java to p5.js.
This will make a index.html file ( don't change this file).
This is the source code for p5.js and is working well:
// example progressbar 
// default variables for progressbar
// start the time for progressbar
var startTime; 
// counter progressbar 
var counter;
// maximum time progressbar
var maxTime; 
// boolean for the end progressbar 
var done; 
// settings for this example
function setup() { 
// set title of window
//frame.setTitle("Example progressbar | free-tutorials.org");
// window size and background color
// p5.js
createCanvas(640,130);
 
//size(640,130);
background(25); 
// set variables of progressbar
counter = 0; 
startTime= millis(); 
maxTime=int(random(1000,1976)); 
done=false; 
//end settings
} 
// draw all text and progressbar
function draw() { 
  // set same background color
  background(255); 
 
  // check end of progressbar fill
  if (counter-startTime < maxTime) {
  counter=millis();
  }  else { done=true;  }
  // create the color for fill progressbar
  fill(110,110,255);
  // no stroke for draw
  noStroke();
  // show all text variables and progressbar
  text("Progress bar blue - size 620", 230, 20); 
  rect(10,30,map(counter-startTime,0,maxTime,0,620), 30 );
  text("counter- startTime "+int(counter- startTime)+" ",10,80);
  text("maxTime "+ int(maxTime) +  " ", 10,100);
  text("map converted counter-startTime"+ int ( map(counter-startTime,0,maxTime,0,200)), 10,120);
  noFill();
 
  }
// reload the draw of progress bar 
function mousePressed () { 
  if (done) { counter = 0; startTime= millis();
  maxTime=int(random(1000,1976)); 
  done=false;
  }
}