This tutorial is about how to use buffers with shadertoy webpage.
Create an account and use the New item from main menu to start a shader.
The default source code when you start the new shader is:
void mainImage( out vec4 fragColor, in vec2 fragCoord )
{
    // Normalized pixel coordinates (from 0 to 1)
    vec2 uv = fragCoord/iResolution.xy;

    // Time varying pixel color
    vec3 col = 0.5 + 0.5*cos(iTime+uv.xyx+vec3(0,2,4));

    // Output to screen
    fragColor = vec4(col,1.0);
}
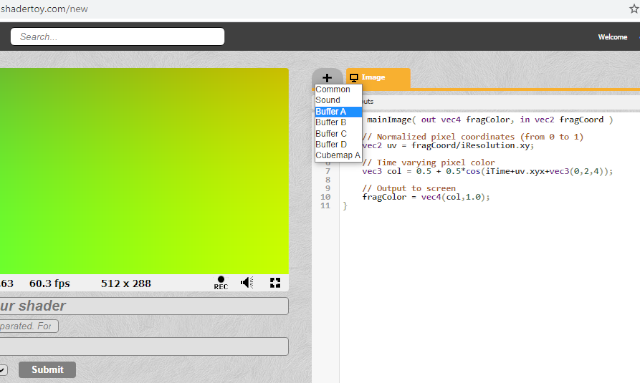
The buffers, Buffer A, Buffer B, Buffer C, and Buffer D, let you create "multi-pass" shaders.
You can run different shaders in each buffer and you can be passed to another buffer with fragColor.
Press the + tab to add a new buffer into the new shader.
See the next image.
The BufferA comes with this source code:
void mainImage( out vec4 fragColor, in vec2 fragCoord )
{
    fragColor = vec4(0.0,0.0,1.0,1.0);
}
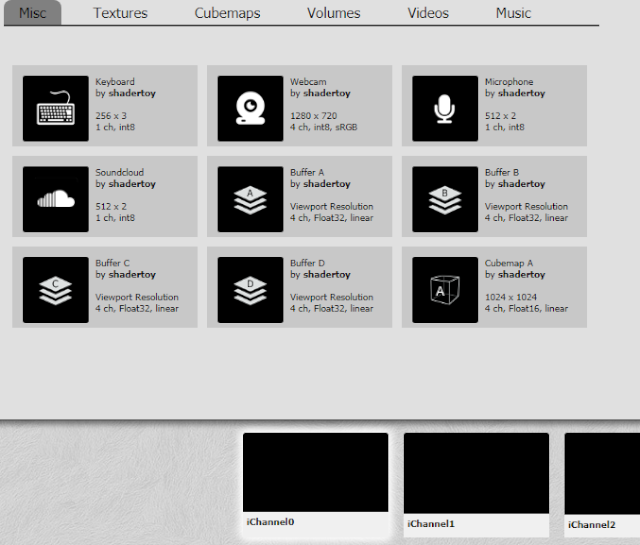
The next step is about the link between BufferA and main shader program.
Click on iChannel0 and select the BufferA, see the next image:
I change teh default BufferA source code with my old source code from another example:
// the my old example: https://www.shadertoy.com/view/XlSBz3
void mainImage( out vec4 fragColor, in vec2 fragCoord )
{
    vec2 uv = fragCoord.xy;
    // set center for circle
	vec2 center = iResolution.xy * 0.5;
    // set radius of circle
	float radius = 0.30 * iResolution.y;
    // create circle with delta and theta function
    // make delta
    float d = length(center - uv) - radius;
    // make theta with color transparency to 0.4 and set 1 for clamp
    // the clamp is a returned value computed as min(max( x , minVal ), maxVal ).
	float t = clamp(d, 0.4, 1.0);
	fragColor = vec4( t, center, (120,230,0));
}
Let's see one simple example:


