Pages

vineri, 14 iulie 2023

Graphics programming - Unity 3D shaders - 003.

This is a new default example like the one from the previous tutorial, it is a little more complex, but you can see the differences.
I commented the default source code generated by Unity 3D and added a default source code for coloring with RGB color range.
// Upgrade NOTE: replaced 'mul(UNITY_MATRIX_MVP,*)' with 'UnityObjectToClipPos(*)'

//Shader "Custom/CG_RGB"
//{
//    Properties
//    {
//        _Color ("Color", Color) = (1,1,1,1)
//        _MainTex ("Albedo (RGB)", 2D) = "white" {}
//        _Glossiness ("Smoothness", Range(0,1)) = 0.5
//        _Metallic ("Metallic", Range(0,1)) = 0.0
//    }
//    SubShader
//    {
//        Tags { "RenderType"="Opaque" }
//        LOD 200

//        CGPROGRAM
//        // Physically based Standard lighting model, and enable shadows on all light types
//        #pragma surface surf Standard fullforwardshadows

//        // Use shader model 3.0 target, to get nicer looking lighting
//        #pragma target 3.0

//        sampler2D _MainTex;

//        struct Input
//        {
//            float2 uv_MainTex;
//        };

//        half _Glossiness;
//        half _Metallic;
//        fixed4 _Color;

//        // Add instancing support for this shader. You need to check 'Enable Instancing' on materials that use the shader.
//        // See https://docs.unity3d.com/Manual/GPUInstancing.html for more information about instancing.
//        // #pragma instancing_options assumeuniformscaling
//        UNITY_INSTANCING_BUFFER_START(Props)
//            // put more per-instance properties here
//        UNITY_INSTANCING_BUFFER_END(Props)

//        void surf (Input IN, inout SurfaceOutputStandard o)
//        {
//            // Albedo comes from a texture tinted by color
//            fixed4 c = tex2D (_MainTex, IN.uv_MainTex) * _Color;
//            o.Albedo = c.rgb;
//            // Metallic and smoothness come from slider variables
//            o.Metallic = _Metallic;
//            o.Smoothness = _Glossiness;
//            o.Alpha = c.a;
//        }
//        ENDCG
//    }
//    FallBack "Diffuse"
//}
Shader "Cg shader for RGB cube" { 
   SubShader { 
      Pass { 
         CGPROGRAM 
 
         #pragma vertex vert // vert function is the vertex shader 
         #pragma fragment frag // frag function is the fragment shader
 
         void vert(float4 vertexPos : POSITION,
            out float4 pos : SV_POSITION,
            out float4 col : TEXCOORD0)  
         {
            pos =  UnityObjectToClipPos(vertexPos);
            col = vertexPos + float4(0.5, 0.5, 0.5, 0.0);
            return;
         }
 
         float4 frag(float4 pos : SV_POSITION, 
            float4 col : TEXCOORD0) : COLOR 
         {
            return col; 
         }
 
         ENDCG 
      }
   }
}
Here is the result attached to the same material from the previous tutorial, but with this default shader.

joi, 13 iulie 2023

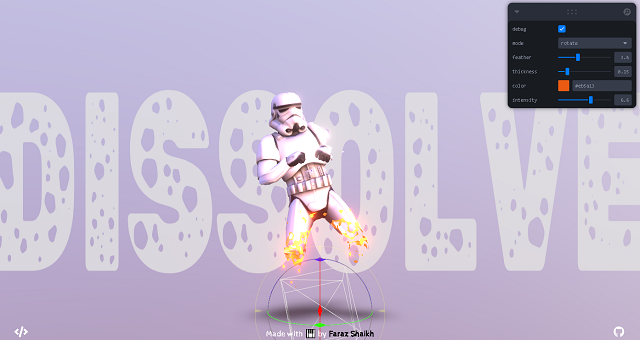
ThreeJS : dissolve shader example.

This example with ThreeJS and shaders is created by Made with 🐪 by Faraz Shaikh, see more on the GitHub user.

News : ... Plask AI Video Mocap Clean Up !

Headshot 2 harnesses the power of AI to handle diverse mesh conditions with a remarkable level of tolerance. It particularly excels at working with severely flawed models, effortlessly generating fully-rigged, professional-grade characters ... from the official website - Reallusion.

News : Harvest Moon: The Winds of Anthos - Official Trailer .

News : Ride 5 - Walkthrough Trailer.

News : The Making of Atlas Fallen - Behind the Scenes of Deck13 Interactive.

Read more on the official website.

Unity 3D : Prefabs in Unity 3D.

You can read documenatation on this official website.
In short, a prefab is a way to package data so that it can be more easily and drag-and-drop into the folder called Prefabs.
Since there is more than one prefab in the construction and dynamics of the game, two creation modes are defined: one original and another that allows us to make changes to the original.
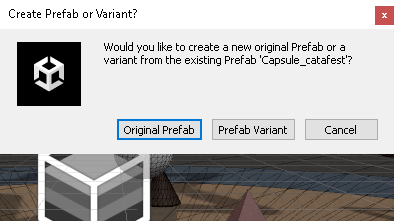
Use the drag and drop operation twice with an object created in the Hierarchy area and you will get a dialog that will allow you to differentiate.
After choosing how you want to use it, the prefab can be used with drag and drop and assigned to the game environment in the Hierarchy panel.
If you want to change it, you will have to right-click and you will see a Prefab menu with submenus for allowed operations.
These are basically what you need to know about prefab.

miercuri, 12 iulie 2023

News : ... the new GMail design from Google.

Take your email game to the next level! With mail merge through Google Sheets and custom layouts in Gmail, you can easily personalize your messages and make a lasting impression ...

News : OXENFREE II: Lost Signals | Official Game Trailer | Netflix.

News : Crimson Hollow by Sheeba Studios.

Crimson Hollow is a hand drawn isometric RPG set in a magical town, hidden from the outside world. Join the community and watch as this game develops!

News : Umami Grove from Pomshine Games .

Umami Grove is a virtual reality cooking video game developed by Pomshine Games and published by DANGEN Entertainment.
... In Umami Grove, you’ll face peril and hone your cooking for the greatest prize of all: Gold! – in the shape of acorns. And possibly enchanted? Your Culinary Journey Begins!

News : Unity plays YOUR games ...

marți, 11 iulie 2023

Graphics programming - Unity 3D shaders - 002.

In this article - tutorial I will show you how to use the most simple HLSL source code with Unity 3D.
You need to install the Shader Graph package in Unity 3D.
Create a basic shader with Create - Shader Graph - BuildIn - Unlit Shader.
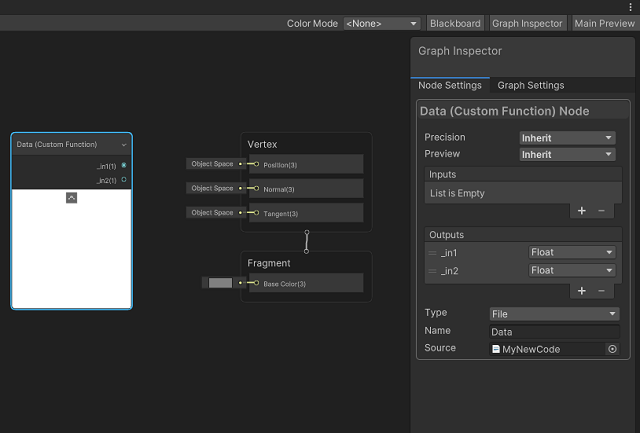
Open this shader in the Shader Graph package and add a Custom Function.
This allows you to create variables and use an HLSL file.
You can see how I create this in this image:
Create a file and name this file with this name: MyNewCode.hlsl then add this in the Shader Graph package like in that image.
For each variable is need to use the Outputs to add these two variables: _in1 and _in2.
In the HLSL file, you can add this simple source code.
// file for custom node shader function
static float _input1Float = 1;
static float _input2Float = 1;
void Data_float(out float _in1, out float _in2)
{
    _in1 = _input1Float;
    _in2 = _input2Float;
  
}
Now, you have a custom node shader in your Shader Graph package project with an HLSL source code.